::I CT For::


::Subscribe To::


::Forum I'm At!!::

Wednesday, September 19, 2012

This tutorial was written by me on 19 September 2012 and updated on
1 October 2022. Any similarity to other tutorials is not intentional.
Supplies:
Tube of choice - I used a beautiful Trinita tube which is an Exclusive at Picsfordesign HERE.
Scrapkit - I used a gorgeous kit by Mizteeque called Spring Pickins which you can download HERE
Template - I used Template 209 by Beth, you can download it HERE
Mask - I used WSL mask 83, you can download it HERE
Filters - Xero Radiance and Fritillary, Penta VTR2
Font of choice - I used Rosette
Don't forget to leave some love when you download!
Let's start!
Open the template. Shift D to duplicate the template and delete the original. Delete the credits layer. Crop. Re-size to 700 x 434 pixels then increase canvas size to 800 x 500. New raster layer, fill while. Arrange send to bottom
Copy and paste your tube under the wordart layers, effects xero porcelain, default settings but change the softness to 12. Duplicate the tube, and on the copy, adjust blur, gaussian blur 3. Change the blend mode to soft light. Drop shadow the original layer.
Circle bg layer - new raster layer, selections, select all, paste paper 18 into selection. On circle bg layer, selections, select all, float defloat. On paper layer, selections, invert, delete.
Circle frame layer - float/defloat, new raster layer, fill with a colour or gradient to match your tube. Select none. Xero Fritillary with these settings.
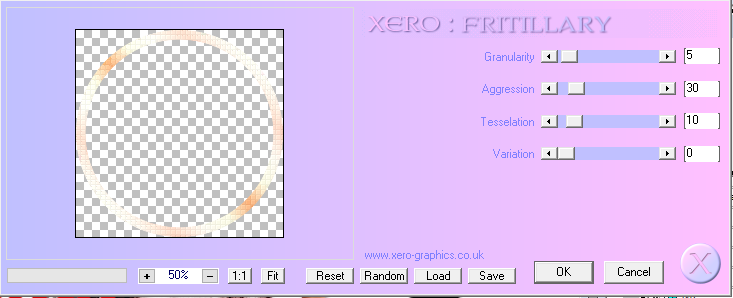
Drop Shadow
Glitter frame layer - Change the colour to suit your tag using Manual Colour Correction. If you haven't used this before, go to Adjust, Colour Balance, Manual Colour Correction. Click on the Source colour and it brings up the dropper, click on the layer in the template then choose your colour the same way by clicking target. Add noise and drop shadow.
Move frame 2 laye above bg1 layer. On bg1 layer merge down (merging bg 1 and 2). Float/defloat, new raster layer, paste paper 1 into selection. Paste your close up into one of the rectangles, selections invert delete. Duplicate tube and mirror, then merge the 2 tube layers. Effects, Penta VTR2. Duplicate and on the copy, adjust blur, gaussian blur 3. Change the blend mode to soft light. On the original, change the blend mode to Luminance L. Drop Shadow
Merge Frame 1 an 2 layers. Float/defloat, new raster layer, fill with the same gradient you used earlier. Select none. Effects, texture blinds changing the colour to white. Drop Shadow
On the 'Warning' text layer, float defloat, new raster layer, fill with a colour to match your tag. Select none. Image rotate, free rotate right 10. Effects, Eye Candy 4000 Glass with these settings
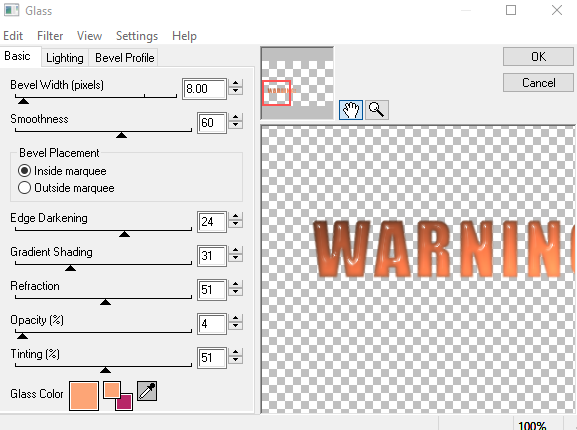
Drop Shadow.
On the wordart layer, re-size 75% and drop shadow. I moved both wordart layers, see my tag.
Drop shadwow elements as you go, see my tag for placement
Copy and paste your tube under the wordart layers, effects xero porcelain, default settings but change the softness to 12. Duplicate the tube, and on the copy, adjust blur, gaussian blur 3. Change the blend mode to soft light. Drop shadow the original layer.
Copy and paste element 15, re-size 30%. Duplicate and mirror.
Copy and paste element 28 re-size 60%. Duplicate and mirror.
Copy and paste element 60 re-size 60%. Duplicate and mirror.
Copy and paste element 54 re-size 35%
Copy and paste element 59 re-size 30%
Copy and paste element 13 re-size 30%. Duplicate, mirror, re-size 60%
Create a new raster layer above the background layer. Selections, select all, copy and paste paper 14 into selection, select none. Load your mask, merge group. Lower the opacity to about 54.
Crop your tag and re-size. Add some sparkles!
Add your name and your artist's copyright and you're finished!
This is the original sample tag

Subscribe to:
Post Comments
(Atom)
::Snag My Blinkie::

::Blogs I Like::


0 comments:
Post a Comment